
Address Bar Logo
Have you ever noticed the little logo on the address bar that every website has? Blogger has the little orange logo with the funny shaped B. I started paying more attention because I have too many websites I like to bookmark just below the address in my browser. I started deleting the name of the sites because for most of my favorite sites, I can use just the logo. But I had 2 of my blogs there, and they both have the same little orange logo. I started wondering if you can put your own logo on. After a little research, I've figured it out. It's such a little thing, but sometimes the little things make it more fun.
First, pick one element or just a couple of letters to use for the logo. Start looking at the logos for your favorite websites and you'll see that they are so tiny that they really can't have much detail. For this blog, I chose the big gerber daisy from the header. Make a new document that is about 22x22 pixels big. This is tiny! I dragged my element onto the new document and shrunk it way down. It looks very pixely and not nice at all if you are zoomed in, but if you zoom way out so it's about the size of the logos on your browser, you will see about how it will look. Save your logo as a jpg.
You actually need your file to be a .ico file, but PSE doesn't have that as an option. There are some websites that will convert your file for you. One I used is http://www.coolutils.com/online/image-converter/. It's very quick to upload your jpg, choose ICO, and download.
The next step took me a little more time to figure out because you have to upload your .ico file to a hosting site. I use photobucket for my backgrounds, but they don't support .ico. Neither does Blogger. After looking at several sites, most of which had strange names that I wanted to steer clear of, I found one that is fast, simple, and you don't even need an account, which I like. Go to http://picturestack.com/?p=. Click Browse, find your .ico file, and click Upload To The Stack. Just like that, it is uploaded. Just make sure to keep that window open until you finish changing the HTML code in the next step. Since you don't have an account, I don't know if you'd be able to look your file up after it's been added if you lose the address. You will need the address for the Direct Link.
Now, from your blog, click Design at the top, then Edit HTML.

Type the above text in the Find feature of your browser. It's in the /* Footer section. Right above that, type in the following line, as seen below. Replace the address between the 's with the direct link for your icon.
 Make sure to do the Preview before Save Template. In the preview, your logo should show up on the Tab of your browser and just to the left of the address bar. It will only show when you are viewing your blog, not while editing anything.
Congratulations! You should now have a cute, little detail added to your already cute blog.
First, pick one element or just a couple of letters to use for the logo. Start looking at the logos for your favorite websites and you'll see that they are so tiny that they really can't have much detail. For this blog, I chose the big gerber daisy from the header. Make a new document that is about 22x22 pixels big. This is tiny! I dragged my element onto the new document and shrunk it way down. It looks very pixely and not nice at all if you are zoomed in, but if you zoom way out so it's about the size of the logos on your browser, you will see about how it will look. Save your logo as a jpg.
You actually need your file to be a .ico file, but PSE doesn't have that as an option. There are some websites that will convert your file for you. One I used is http://www.coolutils.com/online/image-converter/. It's very quick to upload your jpg, choose ICO, and download.
The next step took me a little more time to figure out because you have to upload your .ico file to a hosting site. I use photobucket for my backgrounds, but they don't support .ico. Neither does Blogger. After looking at several sites, most of which had strange names that I wanted to steer clear of, I found one that is fast, simple, and you don't even need an account, which I like. Go to http://picturestack.com/?p=. Click Browse, find your .ico file, and click Upload To The Stack. Just like that, it is uploaded. Just make sure to keep that window open until you finish changing the HTML code in the next step. Since you don't have an account, I don't know if you'd be able to look your file up after it's been added if you lose the address. You will need the address for the Direct Link.
Now, from your blog, click Design at the top, then Edit HTML.
Type the above text in the Find feature of your browser. It's in the /* Footer section. Right above that, type in the following line, as seen below. Replace the address between the 's with the direct link for your icon.

Congratulations! You should now have a cute, little detail added to your already cute blog.
Labels:
Address Bar


How about some FREE digital scrapbook kits?
I won't even admit how long it's been since I've updated this. And with 3 kids now, let's just say that will be the new norm. :)

A BIG thanks to Lindsey for letting me know about her. Her free kits are soooooo cute! (The kits are listed on the right side of her blog.)
And I think I've blogged about these guys before, but Persnickity Prints is fabulous. They have some of the cheapest prices for printing 12x12 pages and lots of adorable freebies too.
Freebies!
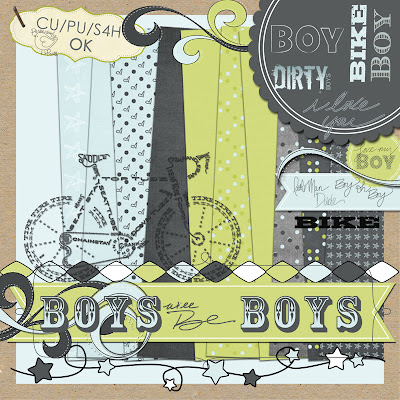
I have been such a slacker lately... But Britta and I have found LOTS of awesome and cute free digikits....check them all out!
 Miss Kim is AMAZING! All of her kits are SO, SO cute. Really...she has great kits for little boys, girlie kits for us girls...I just loved all her stuff. My family blog is currently designed with one of her kits....
There have also been a few blog trains going around, so here they are too:
LDS Blog Train
and
Spring Blog Train

There have also been a few blog trains going around, so here they are too:
LDS Blog Train
and
Spring Blog Train
Labels:
Digital Scrapbooking kits,
Downloads
Photoshop Tutorials
Check out this website with oodles of wonderful Photoshop tutorials by Jessica Sprague broken into categories: Photo Editing, Type Treatments (playing with text), Brushes, Patterned Paper and Drawing Tools, and General Photoshop Tips. Almost any of these tips can be used to make your blog design better. I always love learning new tricks!
Backup of Blog
After I got into my blog and started putting my time and effort into it, I started worrying a little about backing up my work. I was worried about what would happen if blogger had a problem and lost my blog, or stopped providing the service. I found a program you can download for free that backs up any website and makes it accessible on your hard drive, and it's just like the actual website. I feel much better, knowing that I can put my site on a disk for my kids in the future, and have a backup just in case. I actually have the program set to automatically start once a week so I will remember to back it up. I've never had to use the backup, but better safe than sorry.
http://www.httrack.com/
http://www.httrack.com/
Labels:
Backup Blog
Blog Book
Here's a post from my personal blog from last February about my blog book. I need to start working on my 2009 book now. If you're interested in making one, here's some info about it.
"I am so excited! I started making my first blog book a couple of weeks ago. There's a website, http://www.blurb.com, with a free software program that "slurps" your blog posts into a book. Then you can edit the formatting, spelling, and pictures as needed, upload your book, and order it. I spent about 3 days working on it, then got it today. It's just how I wanted it.
Ever since I started my blog, it's been mostly a journal for me. Now it's not just something I can enjoy, but it's something my kids can enjoy when they are older, as well. I'd love to get a couple more later, so each of our kids can have one.
The program is easy to use. It gives you a warning if the pictures are too big to look good when printed. Since blogger shrinks all my pictures for the internet, I couldn't print them very big. They are big enough to support the journaling, but not big enough to be the focus of the book. I do scrapbook and have all of my pictures backed up on the computer, so I'm ok with that. The journaling is the focus of the book for me, anyway. I even have several pictures from my camera phone, and they look just fine in this format.
Some of the sample books I saw on the website showed a full page picture next to the journaling on the other side. I like this look. In order to make the pictures bigger, you can upload them right from your computer instead of using the blog versions. Since I was dealing with 14 months of almost daily posts, it wasn't worth the time to me. You can make it as simple or complicated as you want.
Here's my first book - I guess you can say I'm a published author now."


Labels:
Blog Book
Subscribe to:
Posts (Atom)