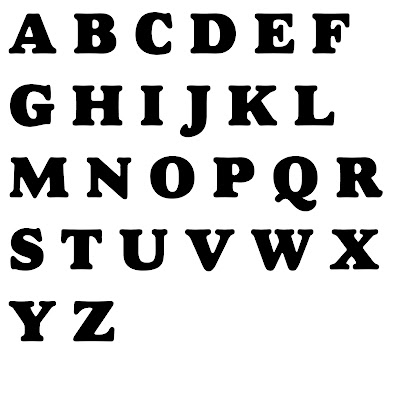
I made myself a template with all the capital letters of the alphabet. It doesn't matter what font you use for the template. I used Alfredo Heavy because it's chunky. Use a text box to type your letters, then save your template as a PDF file. This will save time when you want to make an alpha in the future. I also made a template for lower case letters, and numbers/symbols. Size doesn't matter because you can resize to match your project when you're done. If you just want to make a single word without saving your cute font for future use, you can skip this step.
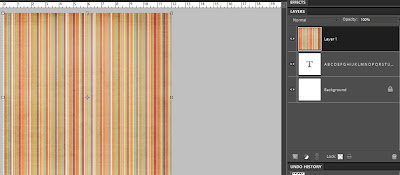
 Open a cute paper you want to cover your letters with. I used some stripes from Shabby Princess Sun Porch. With the Move Tool selected, drag your paper onto your page with the letters. Make sure your paper layer is above your text layer in the Layers Palette, and push CTRL-G (for grab). Or, you can place your cursor in between the two layers in the Layers Palette, press ALT, and click. Your palette will show a little arrow, indicating that your paper is clipped to your text. Your text has now become a clipping mask.
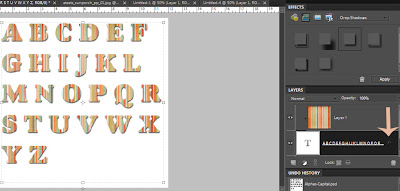
To make your font pop a little more, add some Layer Styles. In the Effects palette, choose Drop Shadows, Bevels, or Strokes. I always use Low for the Drop Shadow. With your text layer selected, click apply. Then double click on the little fx symbol in the Layers Palette. This gives you a window with lots of options. Play around with these options to give your font just the look you are going for.
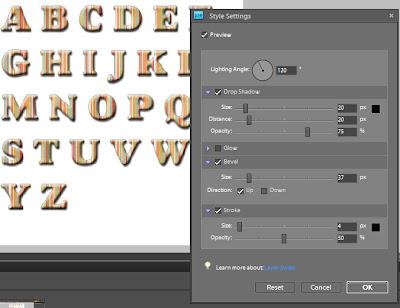
I usually change the drop shadow options to Size:5, Distance:5, Opacity: 40. This gives it a more realistic shadow. Click the little blue arrows by Bevel and Stroke to try those options. Select the check box, and change the sliders to get the effect you want. Bevel makes your image look raised, so it's more 3-dimensional. Stroke outlines your image. You can even change the color of the stroke, if you don't just want black around it. Changing the Opacity of the stroke makes it more subtle.
Now you have a fabulous font. If you just typed the words you are using, you can leave it as is. If you want to save this font for future use, you'll have to tweak it a little. You will want it to be transparent behind the font. You can create it as transparent when you first create a new file, or you can delete the background layer, leaving the rest transparent.
When you are sure your font looks as you want it to, select both your paper and text layers on the Layers Palette by holding CTRL as you click both of them. Right click and select Merge Layers. This leaves you with one fabulous font layer. To save, make sure you do File - Save As, so you don't save over your template if you made one. Save it as a PNG file, since a JPG file doesn't keep your file transparent behind the letters.
To use your font, use your Marquee Tool to select a letter, click CTRL-C, then CTRL-V. This pastes your selection on a new layer. Click on the font layer in the Layers Palette, then select your next letter. CTRL-C, CTRL-V. Do this for each letter you need for your text. Select all the letters in the Layers Palette by clicking on the top letter, holding down Shift, and clicking on the bottom layer. With all the letters selected, you can move them to your project with the Move Tool, then resize them all at the same time, just like you would resize any image. This saves so much time over resizing them individually and hoping they stay proportional to each other. Then place them where you want them.
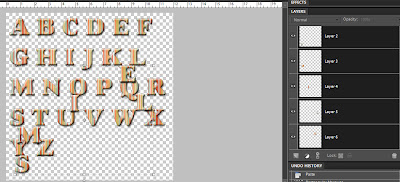

If you don't want to use scrapbook paper, you can go back in the tutorial to where I finished making my template. To change the color, your text needs to be simplified to act as a shape. Make sure you have the font you want first. Then right click on your text layer in the Layers Palette, and choose Simplify Layer. At the bottom of the tools, there is a place to set your foreground and background colors. You can set it to match one of the colors in your project, or use any other color you choose. Double click the little color square to change it to the color you want your font to be. With your text layer selected, go to Edit, Fill Layer. Make sure the Preserve Transparency box is checked. Select Foreground Color for your Content.
You can add any Layer Styles you want, like the drop shadow, bevel, or stroke as described above. Another fun way to make your font pop is to outline it with another paper or style. Hold CTRL while clicking on the little thumbnail of your font layer on the Layers Palette. This makes a dotted line selection around the entire font.
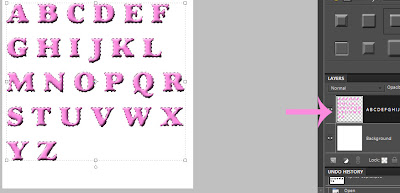
A fabulous trick to make your selection just a little larger than your current selection is to go to Select - Modify - Expand. For a thin outline, I like to do 15 or 20 pixels. For a thicker one, try 25 or 30. I'm doing 25 for this tutorial. After you click OK, you'll notice the dotted line selection surrounds your font a little away from the edge.
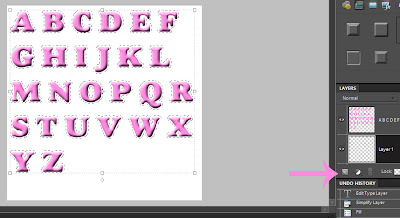
Hold CTRL while clicking the little Create a New Layer button, which is either at the top or the bottom of the Layers Palette. This creates a new layer below your font layer. Now you can use the Paint Bucket Tool to fill the layer with any color you want your outline to be by changing the Foreground Color as discussed above. I just used the color already there, since I want to cover it up with a Layer Style.
For my font, I used a Layer Style I downloaded from The Scrappin Cop, one of many sites that offer free downloads with styles, actions, brushes, and patterns. I applied the light pink glitter style she made. Since each version of Photoshop is a little different, do an internet search if you are unsure how to install these Layer Styles. Apply the style just like you apply the drop shadow, bevel, or stroke styles. You can even play with adding a glitter style to the main font layer, and keeping the outline a solid color. Or you can use the outline as a clipping mask and add a cute paper (with CTRL-G as described above) to surround the font.
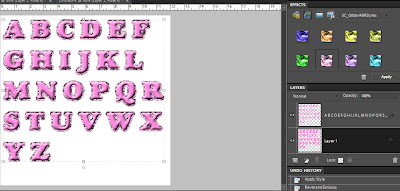
When you are ready to save your font, save it as a PSD file if you want to come back to make changes. To save it as a ready-to-use file, use the PNG format. A JPG file to preserve the transparency.
There is so much you can do with alphas, but these are just a few tricks I like to use on fonts to make them pop more for your project. I know I didn't go into detail with every little step. Every one is at a different level with using Photoshop. If you have any questions, please see the contact info on the sidebar.




No comments:
Post a Comment